Followers

NOTICE:

Now you can click on photo and it will zoom in. Thanks to the HighSlide Javascript. How to do it? its in my "Blog Stuff" page...

Saturday, October 29, 2011

WIP: British Challenger 2 MBT Op. Telic (Part 4) - 1/35 Jersey Barrier

in this entry, i'll explain on how i create the 1/35 Jersey Barrier (K-Rail) usually found on road construction or on some checkpoints or as a barricade. There're resin equivalent out there but i thought i would try to scratch-build some first and see how it fair with the resin counterparts.

the measurement i got off internet (from Capeconcrete.com) and i scale it down to 1/35 scale, so below is the measurement as i calculated.


 Armed with a ruler and a plastics sheet, i draw the measurement on the plastic sheet and come up with this drawing in 1/35 scale (approximation applies).

 Make sure you use a new blade for cutting process and be careful not to cut you fingers, since they are irreplaceable. Anyway, after the cutting and with some glue (i found that using the cheap ABS Glue yield a very good bond between the plastic sheet, compared to other glue), here is the basic shape of the jersey barrier.


 and remember to cover the opening on both end of the barrier, since the cutout i present above will left you with an open-ended jersey barrier.

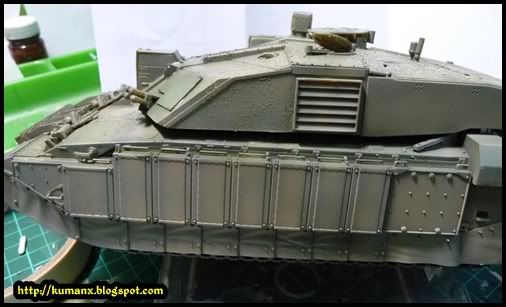
To give it some texture, i sparingly wipe on some industrial thinner on the surface and left it there for a few second before using an old toothbrush and at and angle of 45deg perpendicular to the surface i make a random "jabbing-motion" and here is the result.


 Alternatively, you can use Mr Surfacer 500 and spray it at a distance, this will help create a rough texture on the surface of the barrier (i really need to test this next).

Now i got a few more barrier to make and i "might" cast this as well for future project...

oh.. also need to clean the edges as well since not all jersey Barrie have sharp edges like mine. :)

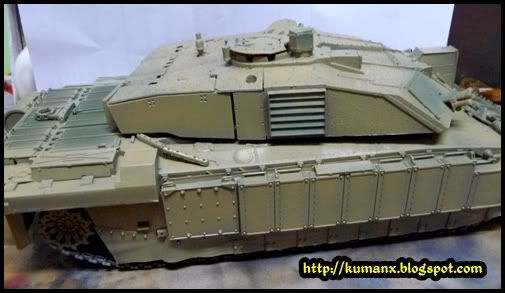
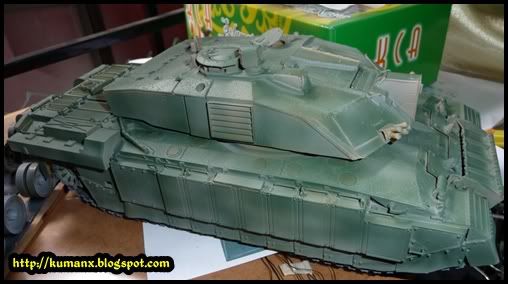
Here are some completed barrier (minus the paint) and how it scale up to my Challenger 2.

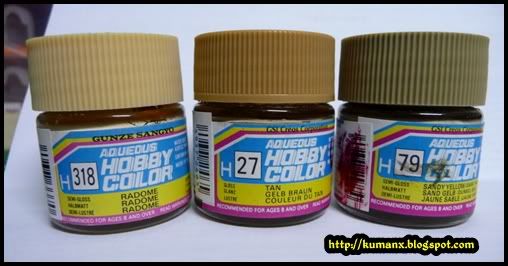
Next, "washing" the tank with turpentine and oil paints also need to paint the barrier.. that will be next...

if more information needed, do left a comment.

kuman

Wednesday, October 19, 2011

Saturday, October 15, 2011

WIP: British Challenger 2 MBT Op. Telic (Part 3)

 moving on with this build..

 next painting the desert color.

from various reference online i can see that the Challenger color varies from yellow to dark yellow.. but most of it will be in yellow color (yellow is not referring to that  of bright yellow, but rather a slight yellow tint.. cant imagine seeing a bright yellow tank in action :o) ).

here are the colors i'll  be using to simulate the yellow paint..

 Gunze Arcylic H318 (Radome), H27 (Tan) and H79 (Dark Yellow)

and the result after a few layers of the color above. The way i sprayed it is starting with the Dark Yellow - Tan - and finally the Radome color.


I think i'll need to add more Tan to the color above, will update the final color very soon.

next step is to create a few Jersey Barrier, to add to the base for this build.
 I'll be scratchbuilding the barrier based on the information i found online.

till later.

Friday, October 14, 2011

"The Avenger" teaser trailer is out!!!

I just found out about this...
and cant wait for May 4, 2012 for the screening of this movie...

i wonder how  the movie would be with all those stellar superheroes.. hopefully it would be awesome. Despite the review (when its release) i'm going to watch it in cinema near me for sure...
 enjoy the trailer..


 and Loki is around...

kuman

Thursday, October 13, 2011

Song of the moment: Taman Rashidah Utama - Wings

This brings back memories ahhahahah

I was making the Jersey Barrier for my Challenger 2, then at random my Winamp played this song. Its a Malay Rock song dated back in 1989.


Back 1989, i was in one of the secondary school in Alor Star, Kedah. Back then this was the song to sing to girls. But in my class, we have a very fierce Maths teacher (we always get in trouble when we couldnt answer her maths questions) coincidently her name is Cikgu RASHIDAH!!!... so we would sing this song to indicate that her class would be next... sometimes she caught us by surprise for singing this song.. and she would again make us regret we ever sang this to her....

Those were some memories.. and now after 22 years.. this song still THE SONG to get "angau" too...

I dont know where Cikgu Rashidah now, hopefully she is well and healthy.

And they sure dont make song like this anymore.. :lol:

back to my scale modelling..

kuman

Wednesday, October 05, 2011

WIP: British Challenger 2 MBT Op. Telic (Part 2)

Painting.. 

After a treatment of Mr Surfacer 1000 (which i think is a must for me), i sprayed a few layer of green paint on the tank. This is due (from my reading) initially before going to Ops. Telic most of these tank usually will be painted with the usual Nato green camo and they got repainted to the desert color prior to the conflict. so this is what i'm trying to accomplish (read the word :TRY :lol:).

 Here are the greens i'll be using...

 below is the result after a few coat of H302 - Green


 Preshading with H330 - Dark Green


 and lastly the overall lighter coverage of H303 - Green something

 i let it sit for a couple of hours, before i sprayed the tank with a hairspray preparing the tank for a chipped technique later on (after i sprayed on the Desert color).

Noted that i installed all the road-wheel and track on the tank prior to my painting. I rarely do this but for this tank, note that the side skirt almost cover the whole track.. so i figure it would save me sometime from painting each and individual road-wheels and the track... cheating.. yes.. but the end result i *hope* would be satisfactory...

Next post i'll show the desert color...

stay tune

Saturday, October 01, 2011

WIP: British Challenger 2 MBT Op. Telic (Part 1)

A new build from me, this time a MBT (Main Battle Tank).

This a build that follows my other MBT build the Abrams (Click me) since i'm getting very inspired of a desert colored tank from the Gulf theater.

 The box shot.

 This Trumpeter kit is not a new kit in fact i got this kit way back in my early years as a modeler a few years back. The build juts going to be OOB and IIRC i didnt use any putty at all in this construction process.. just only i need to use a small plastic sheet to cover the gap between the turret and the top mantlet. Maybe they forgot to supply this little piece of plastic since i think for Tamiya version of the Challenger, they provide a separate piece of vinyl to cover the "gap".

and this kit being an old kit, i also noted that the surface didnt come with an anti-skid surface, so this i need to add and this will be my new experience as well. Here is how i do it, and i got this tips from another forum so let see if this works.

I'll be using Tamiya Diorama Texture paint...


 i just brush on the surface with the paint using a brush. Dont have to be too thick a thin layer would suffice. After that with a brush do a up and down motion perpendicular to the surface and this is the final result.

 i think it looks ok.. so i'm sticking with it... :o)

end Part 1
Related Posts with Thumbnails