A little Update.. for the Jersey Barrier
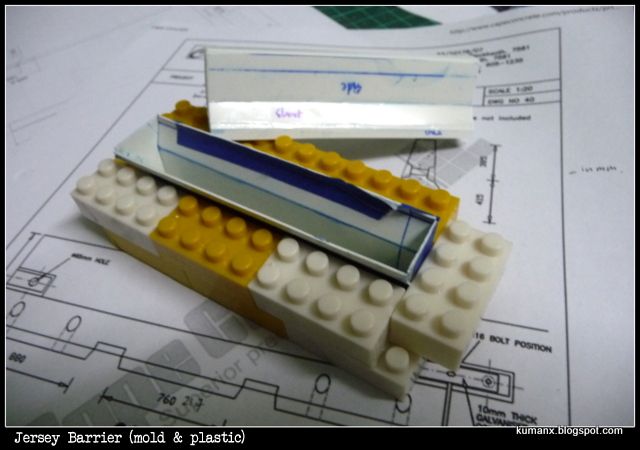
in a bid to make my dio-base busy... i'll add some Jersey barrier..
there
are a few company out there that offers the barrier in plastics &
resin form but me trying to try again the task of making one tries very
hard to ignore the temptation to get the AM barrier.
I've done this before with my Challenger 2 build.. so the drawings and measurement still available.. [Jersey Barrie @ Challenger 2 build]
i'll be making it 2 way.. 1) using plastics sheets 2) using the plastics sheet as a mold.
1) its pretty straight forward... measure the drawing divide by 35 and
you have the 35th scale.. draw it on the sheet and cut... and then glue
all the parts accordingly.
2) Next i'll roughen the surface with thinner and brush... (next step)
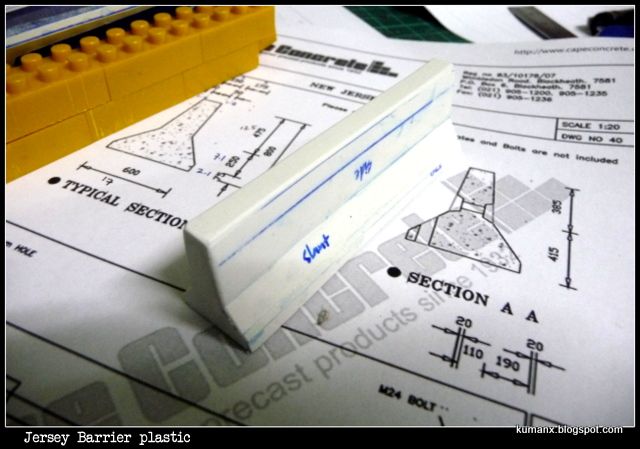
below the plastics sheet version..
Making mold
i repeat the same step as above... but this time i
didnt glue one side of the barrier.. so i'll be a bit easy to remove
the barrier later on..
i used Lego block to hold the mold..
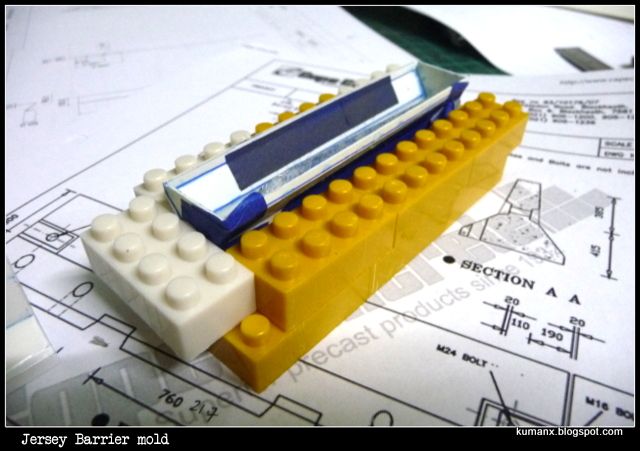
tonight i'll mix some Pollyfilla and pour it into the mold.. and see how
that turn out.. maybe i'll need to make the mixture a bit thick.
will post more update later on and my drawing is as below based on the original barrier drawing from the internet..
until later...
next : The base
Scale Modeler: Miniaturizing the world. Hobby(Scale Model, HRC Shotglass, Movies) & Random stuff ...
Followers
NOTICE:
Now you can click on photo and it will zoom in. Thanks to the HighSlide Javascript. How to do it? its in my "Blog Stuff" page...
Showing posts with label Jerser barrier 1/35. Show all posts
Wednesday, August 27, 2014
Saturday, October 29, 2011
WIP: British Challenger 2 MBT Op. Telic (Part 4) - 1/35 Jersey Barrier
in this entry, i'll explain on how i create the 1/35 Jersey Barrier (K-Rail) usually found on road construction or on some checkpoints or as a barricade. There're resin equivalent out there but i thought i would try to scratch-build some first and see how it fair with the resin counterparts.
the measurement i got off internet (from Capeconcrete.com) and i scale it down to 1/35 scale, so below is the measurement as i calculated.
Armed with a ruler and a plastics sheet, i draw the measurement on the plastic sheet and come up with this drawing in 1/35 scale (approximation applies).
Make sure you use a new blade for cutting process and be careful not to cut you fingers, since they are irreplaceable. Anyway, after the cutting and with some glue (i found that using the cheap ABS Glue yield a very good bond between the plastic sheet, compared to other glue), here is the basic shape of the jersey barrier.
and remember to cover the opening on both end of the barrier, since the cutout i present above will left you with an open-ended jersey barrier.
To give it some texture, i sparingly wipe on some industrial thinner on the surface and left it there for a few second before using an old toothbrush and at and angle of 45deg perpendicular to the surface i make a random "jabbing-motion" and here is the result.
Alternatively, you can use Mr Surfacer 500 and spray it at a distance, this will help create a rough texture on the surface of the barrier (i really need to test this next).
Now i got a few more barrier to make and i "might" cast this as well for future project...
oh.. also need to clean the edges as well since not all jersey Barrie have sharp edges like mine. :)
Here are some completed barrier (minus the paint) and how it scale up to my Challenger 2.
Next, "washing" the tank with turpentine and oil paints also need to paint the barrier.. that will be next...
if more information needed, do left a comment.
kuman
Subscribe to:
Posts (Atom)