Followers

NOTICE:

Now you can click on photo and it will zoom in. Thanks to the HighSlide Javascript. How to do it? its in my "Blog Stuff" page...
Showing posts with label AAV-7A1/EAAK. Show all posts

Wednesday, March 09, 2011

Kumanworks - got updated now with VisualSlideshow 1.5

Finally after a long wait and many model built, i finally got the chance to update my modelling website with some layout enhancement.

http://kumanworks.110mb.com
kumanworks on the web
My website is located at http://kumanworks.110mb.com

I started to use VisualSlideshow 1.5 (Free version) to show my Completed Gallery.

This can be view in my AAVP7A1 Completed page (click me to go there directly)

I'm planning to continue this trend throughout my website updates from now on and see how that goes.

Next update will be of my Tornado build.

stay tune and go give my new layout a go and let me know if i need to change something on that page or how the loading for that particular page is it slow? ok or fast..:D

So far i know that it works fine on Internet Explorer and Mozilla.

thanks for all the support

Friday, November 19, 2010

Building MiniHobby AAV-7A1 with EAAK (Part 8 - FINAL) - COMPLETED

UPDATES: PART 8 (IT'S COMPLETED)

(All the Previous AAVP-7A1 build can be seen HERE. )


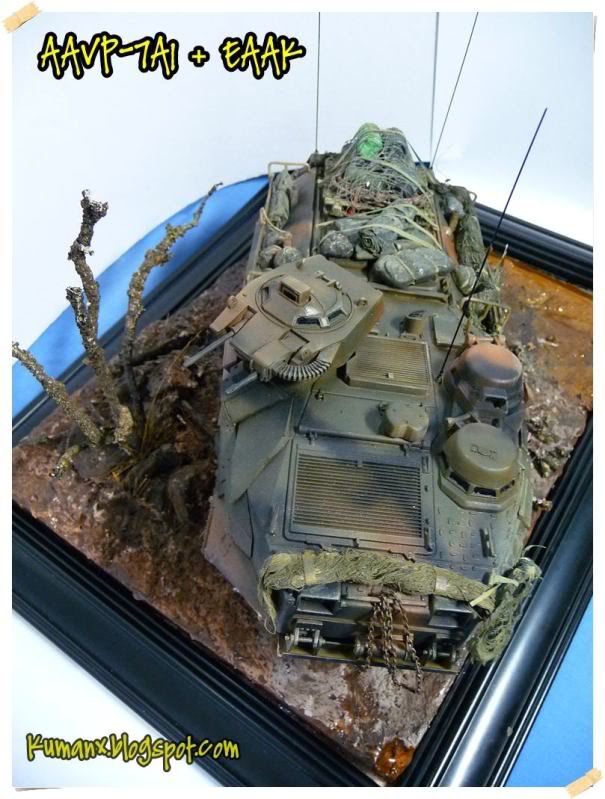
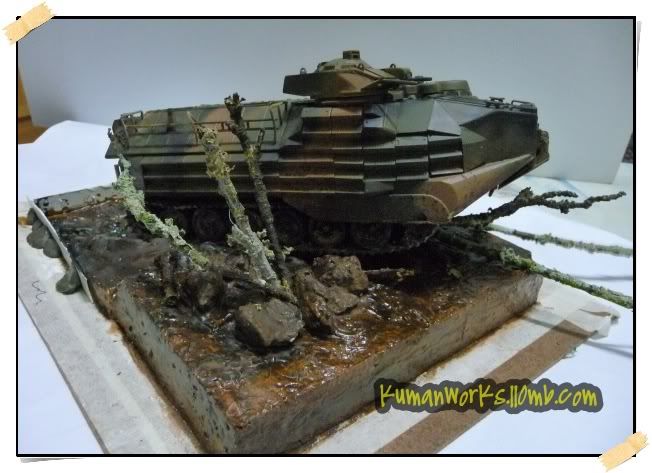
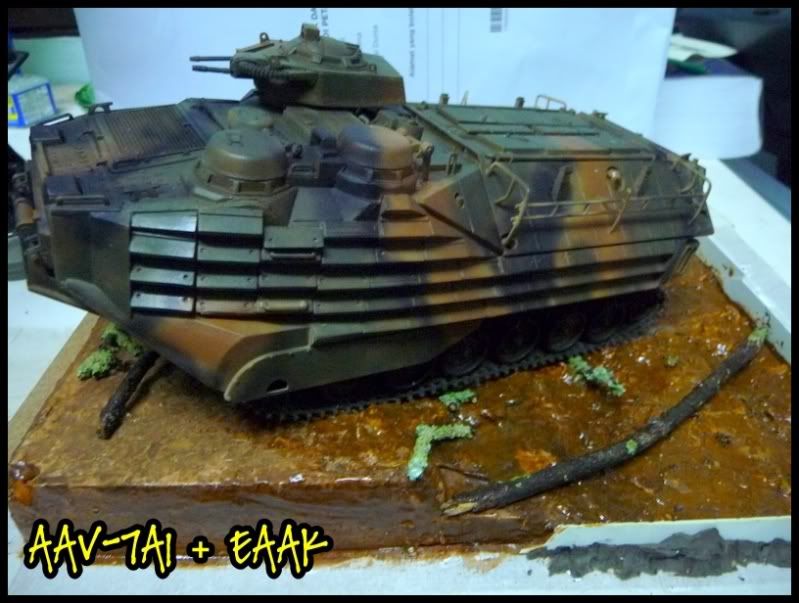
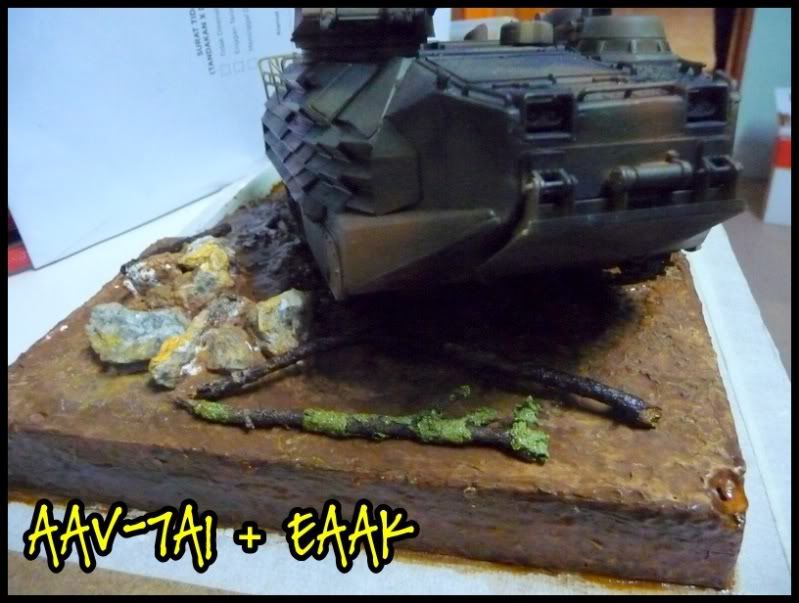
This is it, finally this build is completed last night.


After a few months of tinkering and adjusting and building the AAVP-7A1, i finally can claim another addition to my display cabinet at home.


This AAVP already being submitted (the photo only for a "virtual"entry) to the Group Build committee and the event will be held tomorrow. So if anyone is in town tomorrow, do give them a visit at HHQ.


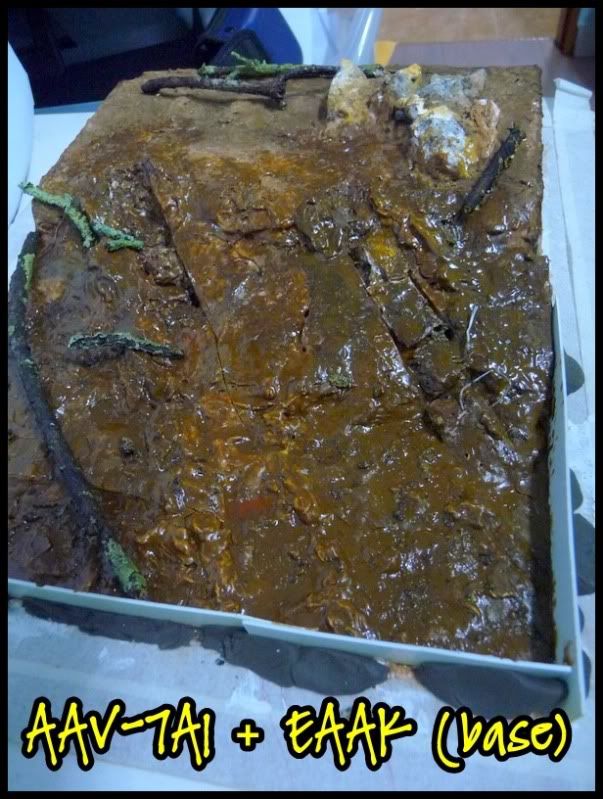
I learned a lot in the progress of building this model and noted that this is my first time building it with a dio-base.. pretty awesome step and i'll continue doing this in the future, no doubt about it.. :D


If anyone need more information on this build, please ask away either in the shoutbox or leave a comments, i'll promptly answer any questions wherever i can.. :D


More photos below...


Tuesday, November 16, 2010

Building MiniHobby AAV-7A1 with EAAK (Part 7) - Rolled Canvas

UPDATES: PART 7 (Rolled Canvas)

(All the Previous AAVP-7A1 build can be seen HERE. )

The last few days, i've been busy giving my AAV-7A1 its finishing touches to make it ready for the Group Build on November 20, 2010 (this ENTRY)

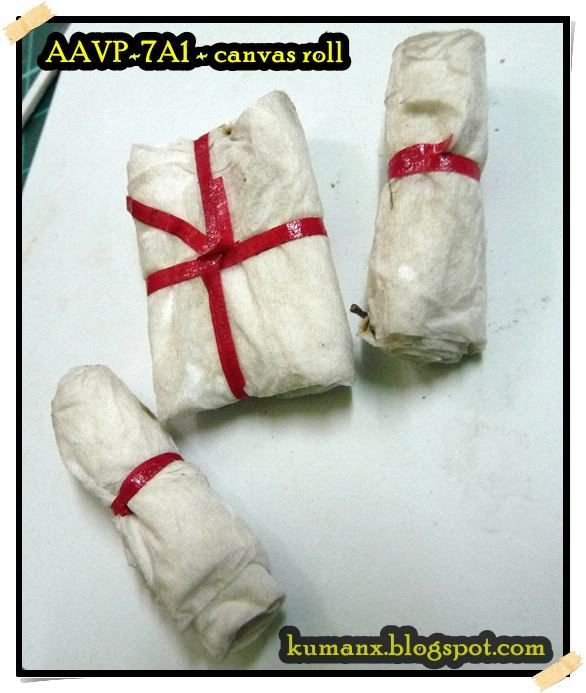
 This entry we'll be making Rolled Canvas

The Raw material:

  1. Facial tissue - as the canvas
  2. White glue - to hold the shape
  3. Masking tape - strap

  • - Shape the tissue to a tube (if want to make it rolled) or fold it normally (if you want to make it as a folded canvas)
  • - I did both, and then use the masking tape as a strap.
  • - Dilute the white glue with water and then brush it on the canvas.

  • - Let it dry and then apply base color for it, flat coat it, do a "wash" and you done...

BEFORE:

Sunday, November 14, 2010

Building MiniHobby AAV-7A1 with EAAK (Part 6) - Accessories

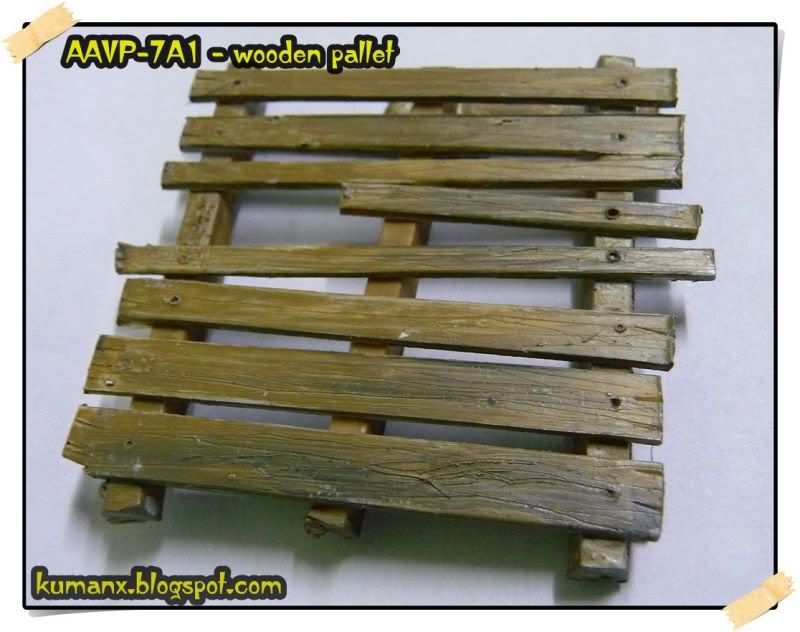
UPDATES: PART 6 (Wooden Pallet)

(All the Previous AAVP-7A1 build can be seen HERE. )

The last few days, i've been busy giving my AAV-7A1 its finishing touches to make it ready for the Group Build on November 20, 2010 (this ENTRY)

So, as a progress, i've finish creating a wooden pallet to put on the tank as to show that its carrying a lot of load & supplies for the troops.

All were created from scratch using only :
  1. plastic-sheet, (for the wooden pallet)
  2. normal gauze, (for netting)
  3. some white glue, (to make everything stay in place)
  4. some masking tape (as strap)
  5. some fine wire (as barbwire)
  6. some capacitors from broken Power Supply (for the drums)

First the completed wooden pallet:


Friday, November 12, 2010

The upcoming Amphibian Group Build (November 20th, 2010)

To help promote the event, i hereby post the Amphibian Group Build (AGB) 2010
which will be held next week November 20, 2010.

Event: Amphibian (Katak) Group Build 2010
Venue: Hobby HQ, KL
Date: November 20th, 2010
Time: 10am ~ 5pm

Friday, November 05, 2010

Building MiniHobby AAV-7A1 with EAAK (Part 5)

English Mode: ON

(kuman: a little bit more about my hobby ya.. :))

Part 1 of the build. 
Part 2 of the build
Part 3 of the build 
Part 4 of the build


Part 5:

Another round of updates guys...

the build is closing to the end already  (but not quite)

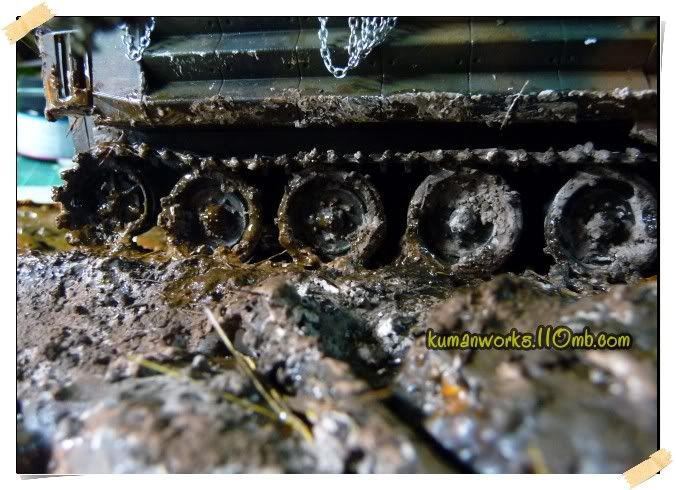
i heed the advise of some of you guys to really make the track dirty.
So i make some adjustment and below is the result so far..

and the tank is glued to the base already.... no turning back now..


The VERY MUDDY track.


Thursday, November 04, 2010

Building MiniHobby AAV-7A1 with EAAK (Part 4)

English Mode: ON

(kuman: a little bit more about my hobby ya.. :))

Part 1 of the build. 
Part 2 of the build
Part 3 of the build 

Part 4:

Moving along
now i update a lil bit the base since i'm not quite satisfied with the previous result.
it looks to bare and too clean..

also note that i also added a few tree (mock-up tree of course).

This tree will be painted soon since to make it match the scale of the whole base.


Thursday, October 14, 2010

Building MiniHobby AAV-7A1 with EAAK (Part 3)

English Mode: ON
(kuman: a little bit more about my hobby ya.. :))

Part 1 of the build. 
Part 2 of the build

Part 3:
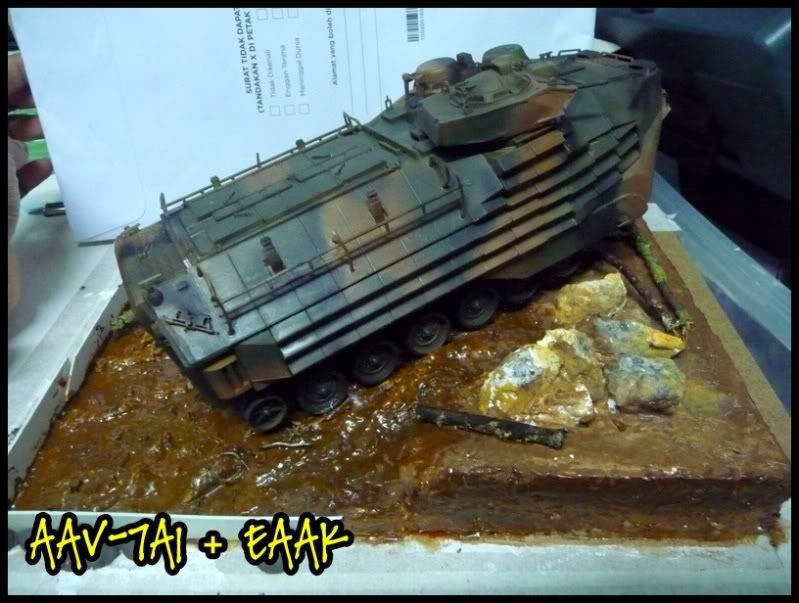
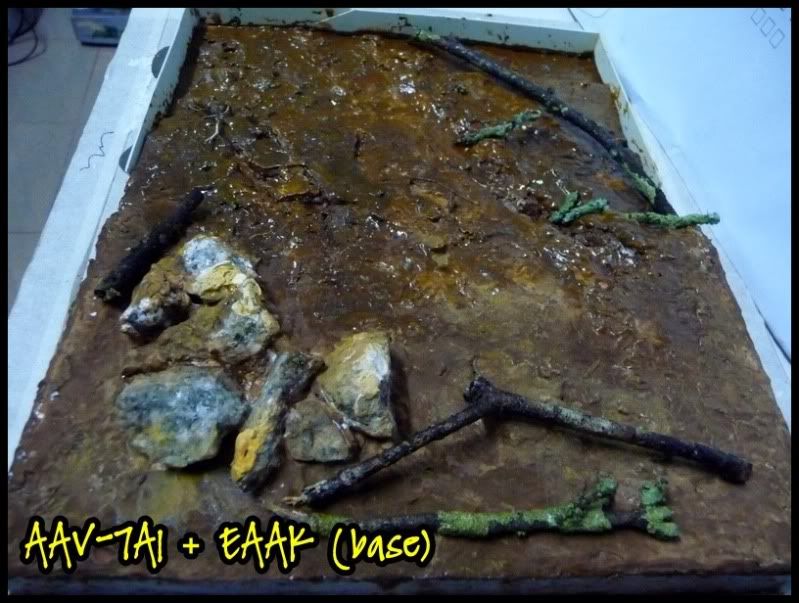
Moving along with the build, now i got some inspiration to actually make a base for this build.
And this is my first time doing so, so please forgive the mistake and short coming.


I used a Styrofoam as the base and then layer a industrial wall putty to cover the styrofoam and make it hard and also will make it easier to paint.

For the base i just some poster color (Vandyke Brown) and just paint the surface at random.

Then i would mix some White Glue with water and then just pour it on the base to form a protective layer for the ground base color.


The wood i used a real plant twigs which i first soak in thinner solution to remove all the bug that might be lurking on the twigs.
Again i use a white glue to stick the twigs in place and of course all the twigs will need to be painted as well.

I still havent pour in more white glue mixture to the river since i first would need to paint the base with a "teh-tarik" color to simulate a dirty water after the tank had run though it..

Next is to weather the tank to match the base. and the base it not yet done... :o)

Until next time.. enjoy the photo below..


kuman: a little bit more about my hobby ya.. :)

Sunday, September 19, 2010

tido lambat tengok tv?

(gambar dari internet, aku edit jer)

aku jarang tido lambat.. tapi memandangkan esok cuti (cuma nak kena bangun awal sbb nak anto anak ke sekolah) aku pun membenarkan diri aku tidor lambat mlm nih... jam dah tunjuk jam 3:15 pagi and mata pun dah sedikit kuyu.

Anak2 abis dah lena & yg bongsu nih lena atas lap... manja la tu :o)

Tapi camno nak tido nih.. kat National Geographic ada cite best lak.. INSIDE: MARINE ONE.. documentary yg best....

nampaknya jam 4 jugak la baru aku bleh tido nih...
dah ler esok pagi nak kena cabut rumput lepas jadi Bas Sekolah.. pastu nak kena basuh kereta lagi sekali...

takpe.. takpe..

ataupun nih penangan Kopi Kampung dari rumah adik aku maghrib tadi nih... yg menyebabkan aku tak ngantuk....

TO DO Esok:
- Blog update untuk bahagian last "12 Jam di Perlis" (Bahagian 1), (Bahagian 2)
- Nak buat scale model sikit.. diorama untuk AAVP7A1 aku tuh.. (Semua Bahagian)
itu je la kot ..:)

Selamat Malam....

Friday, August 27, 2010

Building MiniHobby AAV-7A1 with EAAK (Part 2)

English Mode: ON


Building AAV-7A1 (Part 2)

For Part 1, HERE..


Continuing on with the painting, i intended to make this in a 3-tone-camo since in the last installment, i've already begin the first tone, now it time to go the 2nd tone... the dark green.

Dark Green camo
I used Gunze Arcylic H303-Dark Green for this and is thinned to a milk-consistency (flow like a milk) ratio.

Again, i'll be doing the camo freehand as its a good practise for me to make my hand steadier for this kind of feats.

When this is done, i'll proceed with a Flat Black camo.

Flat Black camo
- Some of my friend suggested to me to use a NATO Black, but since i dont have it in my stock so i have to make do with Flat Black H12.

So this is where i'm now..


Next in the agenda, will be to touch-up the demarcation line between the brown-camo and the green-camo by using a thinned dark-green to actually make the border more blended together.

After that i'll be leaving this for a bit to concentrate on something else in the process... which includes the following

1. Casting bag-pack and bedrolls to put on the vehicle
2. Painting the track.
3. Preparing the dio for the base (still in planning)
4. Creating custom made bedrolls from tissue etc.

until then..
enjoy...

Wednesday, August 25, 2010

Building MiniHobby AAV-7A1 with EAAK

English Mode: ON


Building AAV-7A1 (Part 1)

This is my latest modelling project, which is a AAV-7A1. More information about this AAV-7A1 ..HERE..

and the kit of choice is MiniHobby kit. Scary stuff to build and of-course do not compare this to the Tamiya offering... very the different...
Since the MH offering is just very crude since it is meant to be use as a toy, they even included an engine and battery compartment in this kit. Of course i'll not be using them.

This the kit box


Painting
I'll skip all the construction stuff since i just follow what even in the instruction sheet and plunge right into the painting stage..

so i'm building this as OOB and now i'm at painting stage..
completed the first camo color.. of course somehow initially my plan was to have this in Desert scheme (dark yellow) but now decided to test doing those with green-yellow-black camo thing..

in This segment.. i already finish the first camo which is the yellow-brown color. I used Gunze Wood Brown H37 (suggested by the kit to use XF-64 Red Brown).
and i'm doing this free hand... never try, never know right... and thats why my camo not the same as the suggested camo from instruction.. hope this is ok.. biggrin.gif

here is the out come... and if you noticed that the surface a bit glossy, this is due to me spraying Hairspray to simulate chip later on.... i forgot to do it earlier ...


I'll update more tomorrow..
Related Posts with Thumbnails